Build Your Website with Hugo and blogdown - How I used RStudio, GitHub and Netlify to create and deploy my own webpage
This year has been rather rewarding for me! After completing some of the excellent Business Science University courses, I have worked on a number of Customer Analytics & Business Intelligence projects and summarised them into technical articles that I published on Medium’s Towards Data Science. This opened up an entirely new world to me and generated many new connections within the analytics and data science community the world over!
The idea to create my own website has been at the back of my mind for a few months. So far I’ve used rpubs.com (the free web publishing service from RStudio) as a portfolio of sorts but I knew I needed a personal web-space. That would give me the freedom to showcase my work in a more professional way, accommodate articles that I didn’t necessarily want to publish, and personalise with links to favourite blogs/books/sites as well as my social media platform ( LinkedIn, GitHub, Medium, etc.).
When Matt Dancho got in touch in early October 2019 to say that he liked a number of my articles and wanted to feature some of them on his blog, I knew I could no longer wait. So I put on hold the project I was working on and I gave myself a week to come up with a minimum viable product to put online.
8 days later, I was super excited to deploy diegousai.io!
And Matt Dancho has even been kind enough to feature my newly created webpage on his 23-Oct-2019 webinar SQL for Data Science!
Overview
In this post I’m going to share what I’ve learned from my website building adventure. As I’m not a web developer nor a programmer, there have been moments where I though to myself “What heck of a rabbit hole have I fell into?”.
Thankfully, there are plenty of blog articles, online books and developer forums, all with varying degree of technical detail. Here I’m going to show what worked for me and will reference all the material I’ve sifted through and the approaches I’ve applied it my many trial-and-error runs.
As it is always the case with these things, I’m sure there are more straightforward ways get to the same result so I genuinely welcome tips and suggestions on how the process could be streamlined and improved.
Some preliminary readings
This is some of the material I have referred to more or less consistently throughout the process:
- The blogdown: Creating Websites with R Markdown book, which has plenty of accessible information and useful tips.
- The Academic framework documentation also has lots of information, albeit more technical.
- Alison Hill blogpost Up & Running with blogdown has provided plenty of inspiration
- Another post I would recommend is Martin Frigaard’s article, How to build a website with Blogdown in R, which has much more detail on Git and version control.
Assumptions, disclaimers,etc.
Assumption #1: I’m assuming that you’re familiar with the RStudio IDE and have already installed the blogdown package and Hugo on your machine. If not you can refer to the Get Started chapter of the blogdown book.
Assumption #2: I’m also assuming that you already have a Github repository, which I will use to host my website. If not, you can create one for free here.
Disclaimer: This is not intended to be a technical guide as I’m not a web designer/developer nor a programmer. This is my report as an ordinary RStudio user on how I set up my blog using blogdown. I welcome comments and suggestions as I’m sure my process has a more streamlined flow to it.
Create the website
Generating a webpage could not be any easier!
Pick a Hugo theme
First, you need to pick a theme. Currently, there are hundreds of themes you can choose from on the Hugo website and it’s worth spending a few minutes perusing the list and try a few of the demo versions to get a feel for the final product.
Some of the themes that stood out for me are:
Academic: This is probably the most popular theme and, as the name suggests, it draws inspiration from the academic world. It is highly customisable with plenty of widgets and extensions, is well documented and has a large community supporting it. However, the number of features and customisations may prove be a bit daunting to get your head around, especially if you’re a novice like myself, so you may want to pick a simpler theme to start off with.
Future Imperfect Slim: I really did like this Theme! It’s streamlined and very responsive and comes with multilingual integration and an extensive sets of Social Media icons to link all your accounts. Unfortunately, in August 2019 a bug which prevents some of the posts to show on the main page has emerged. As of October 2019 the issue is still unresolved but hopefully this will get sorted out soon.
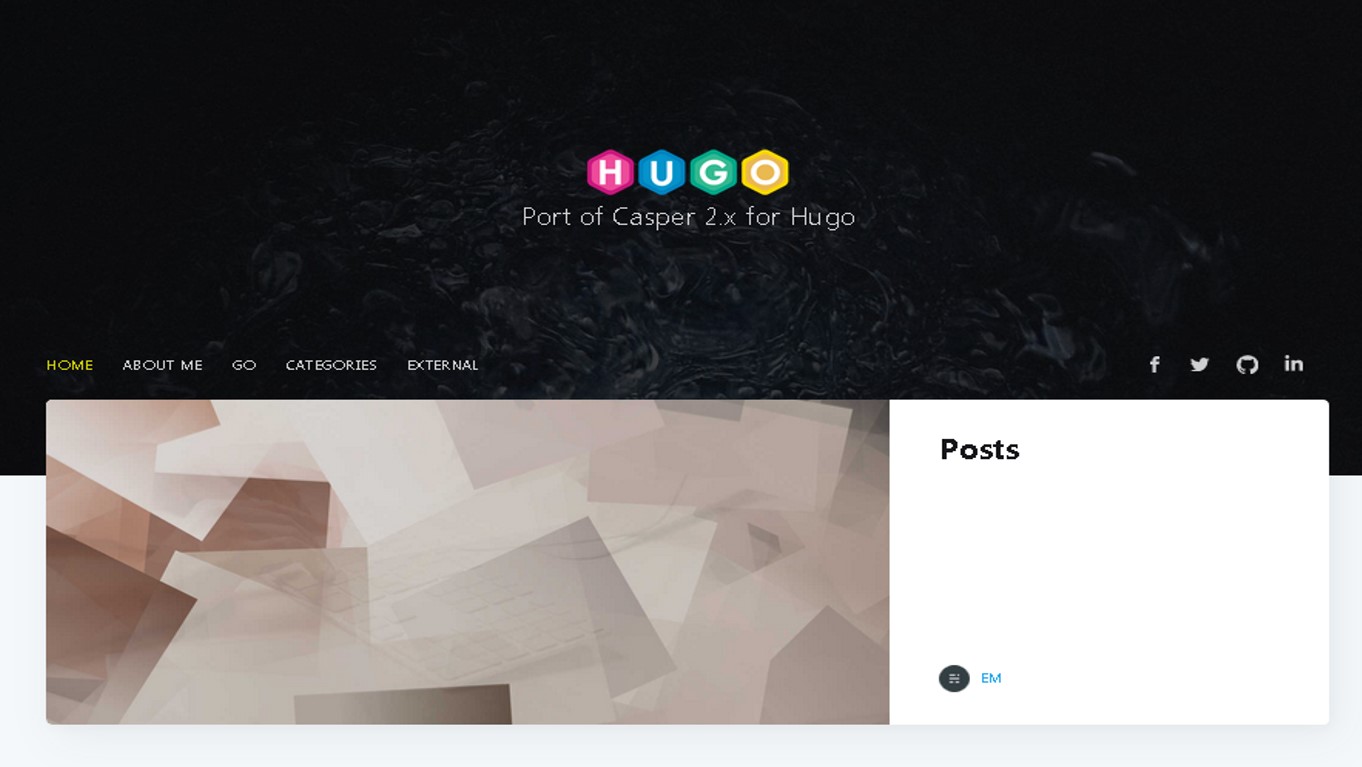
Casper Two: I chose this theme because is has a relatively simple structure, which makes it easy to navigate and personalise, and has just the right amount of Social Media links for me. And it’s beautiful!
- However, be aware that that this theme appears to be currently NOT SUPPORTED by its developer and as such has been removed from the Hugo Themes Page. This may result in “code breakages” when a new Hugo update is released (in fact I’ve already encountered and fixed one!) but given the simplicity of the theme structure and code supporting it, I’m hoping that will push me to learn more about HTML and CSS to maintain my site going ahead.
Once you’ve decided which theme suits you best, click on the Homepage button on its Theme page. This will take you to the github repository housing the theme. Here’s the Casper-Two repository.
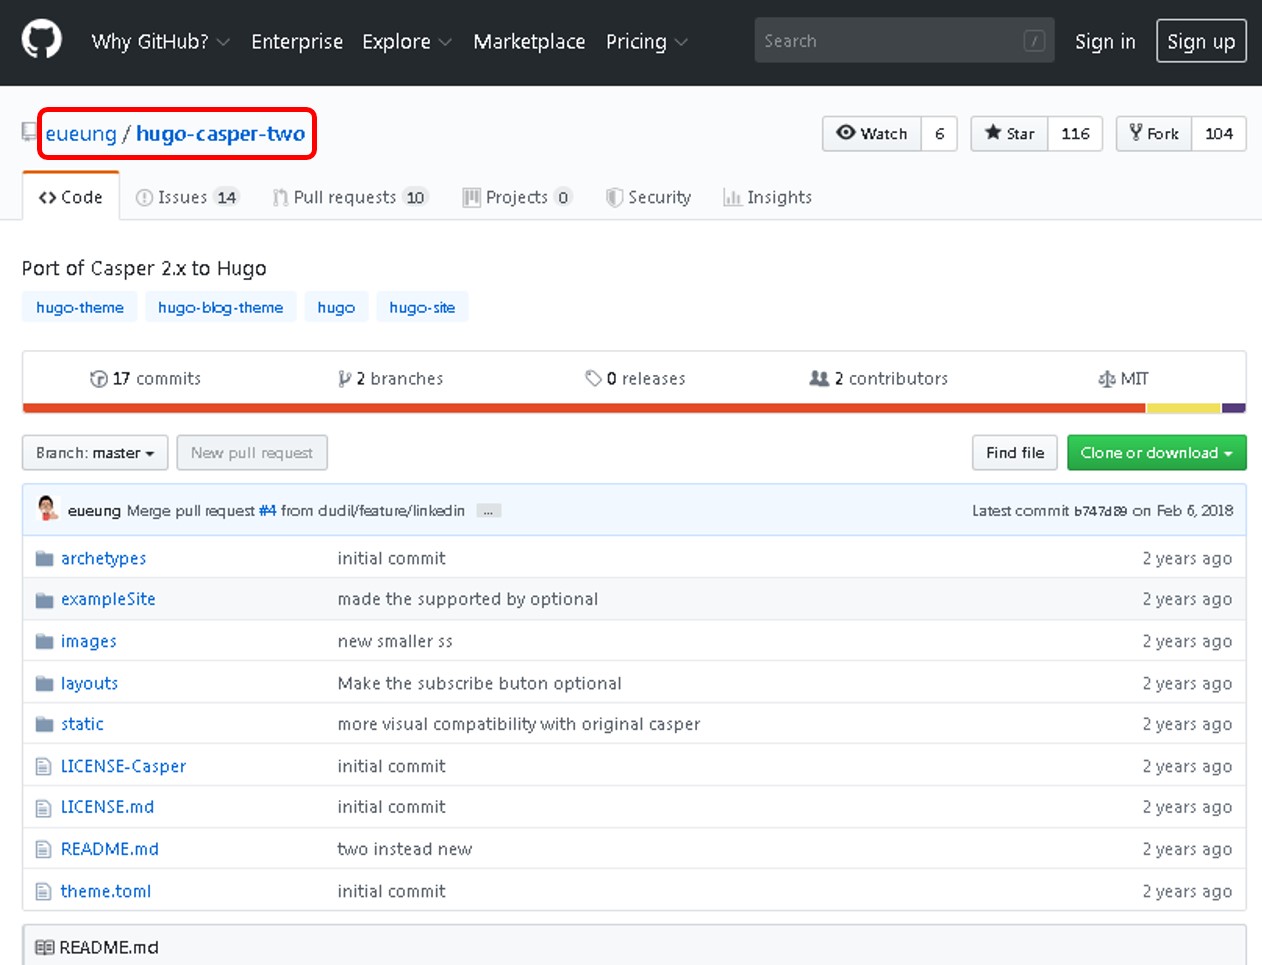
Take a look at the top left-hand side of the page: this tells you that the theme is owned by eueung and it’s housed in the hugo-casper-two folder. Make a note of the location address (or copy it to clipboard).
Create a new project directory
You can now create a new project for your website:
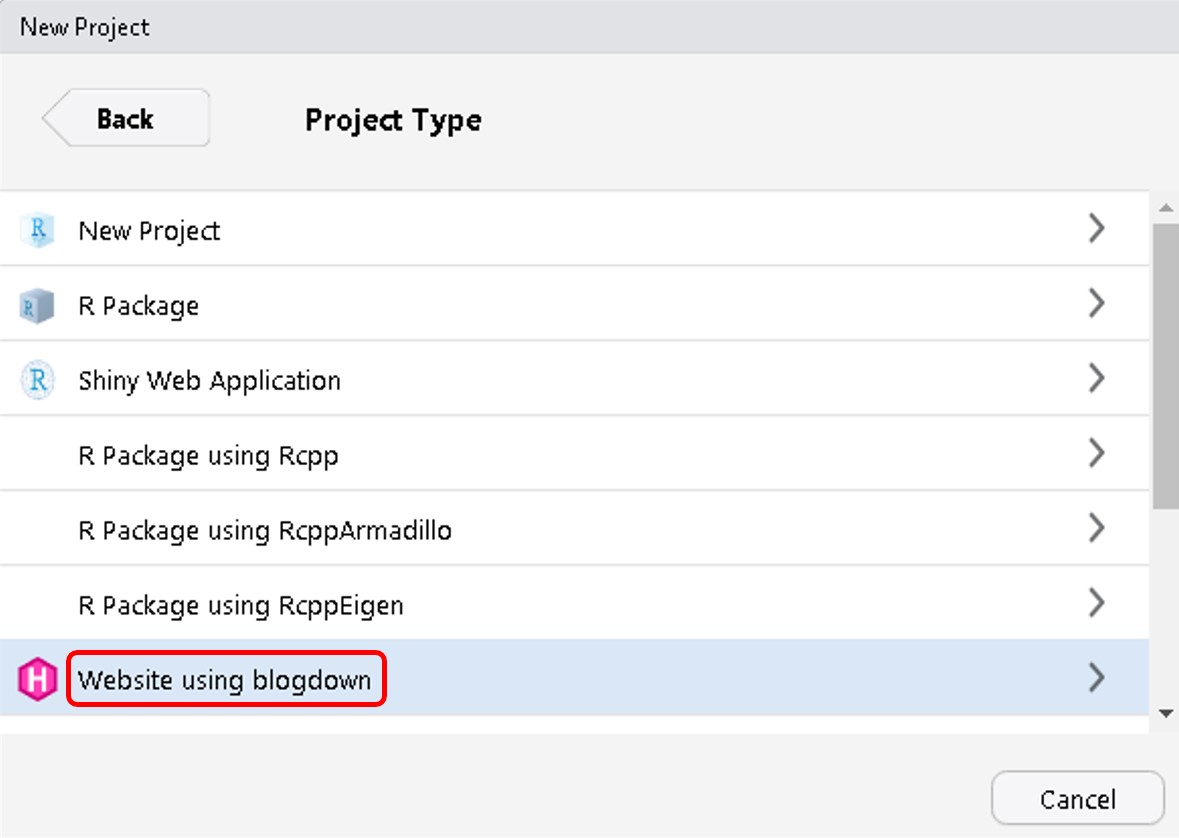
in RStudio, go to File → New Project → New Directory → Website using Blogdown
In the following page, pick a directory name for your website and write/paste the github theme location from the previous step
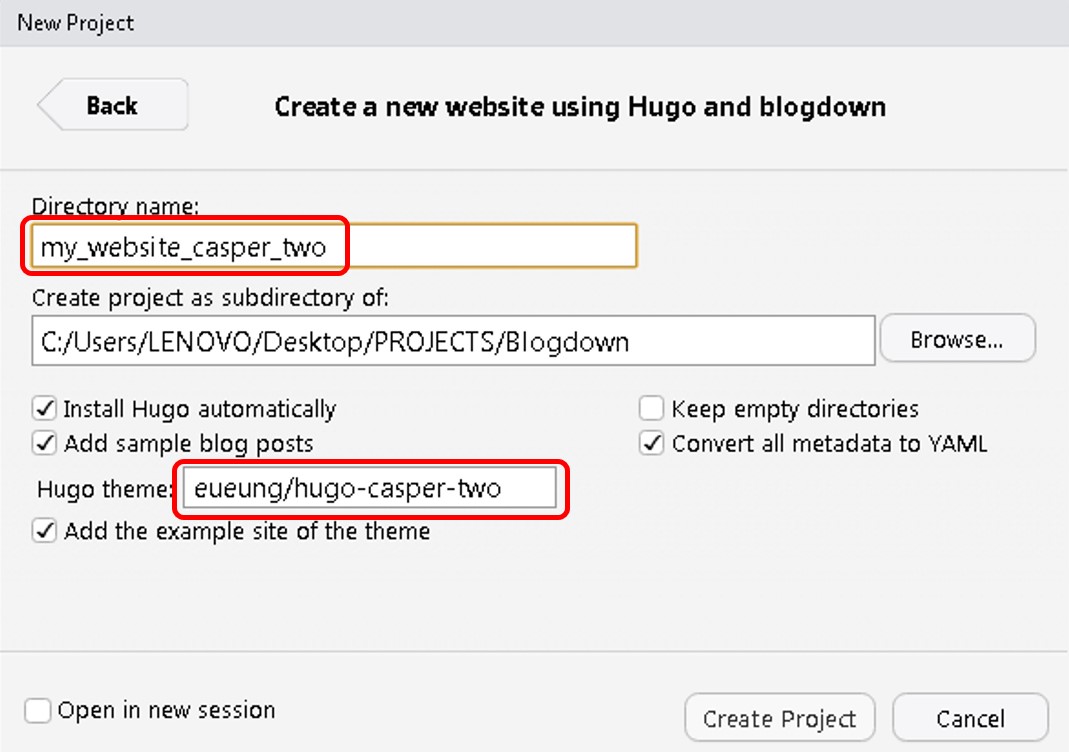
You can now hit Create Project and RStudio will import all files from the Github repository and populate the new directory with a series of folders.
The directory structure
Let’s take a look at the folder structure that has just been created
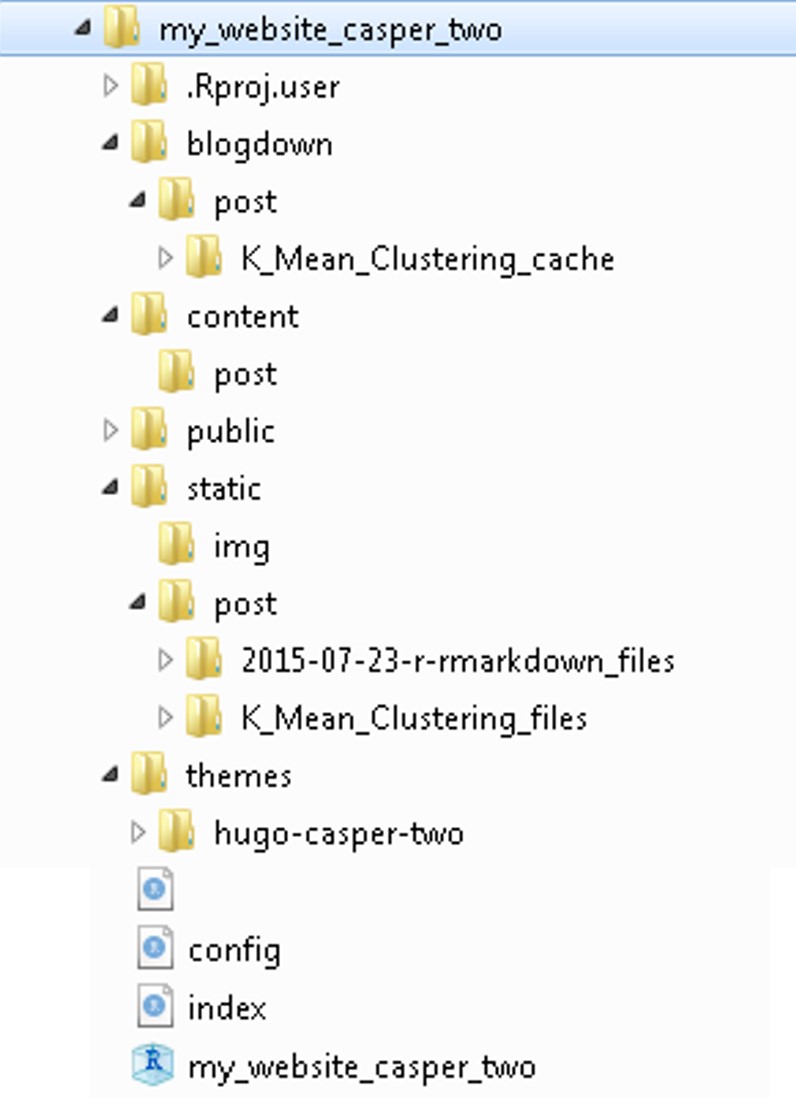
Most parameters are self explanatory but more details can be found on the Configuration chapter of the blogdown book
config.toml: is the main interface to your website and contains all the global option to personalise your site’s contentcontent: all your material ( articles, projects, posts, “About me” page, CV, etc) is added and stored herestatic: is the folder where images and videos are kept- If one of your posts outputs a chart or graph, it will be stored here
- If one of your posts outputs a chart or graph, it will be stored here
blogdown: cache files created by your posts are saved herepublic: the final html files and site structure gets stored here when Hugo creates your website. This is the static version of the blog we will use to deploy to our domain.themes: contains all the formatting for the theme and should be left untouched. I’ll look into how to override some of the theme formatting later in the post.
Build the website
You are now ready to create your website and you have a few options to do just that.
1 - build_site()
Run build_site() in the command line to build a ready-for-publishing site
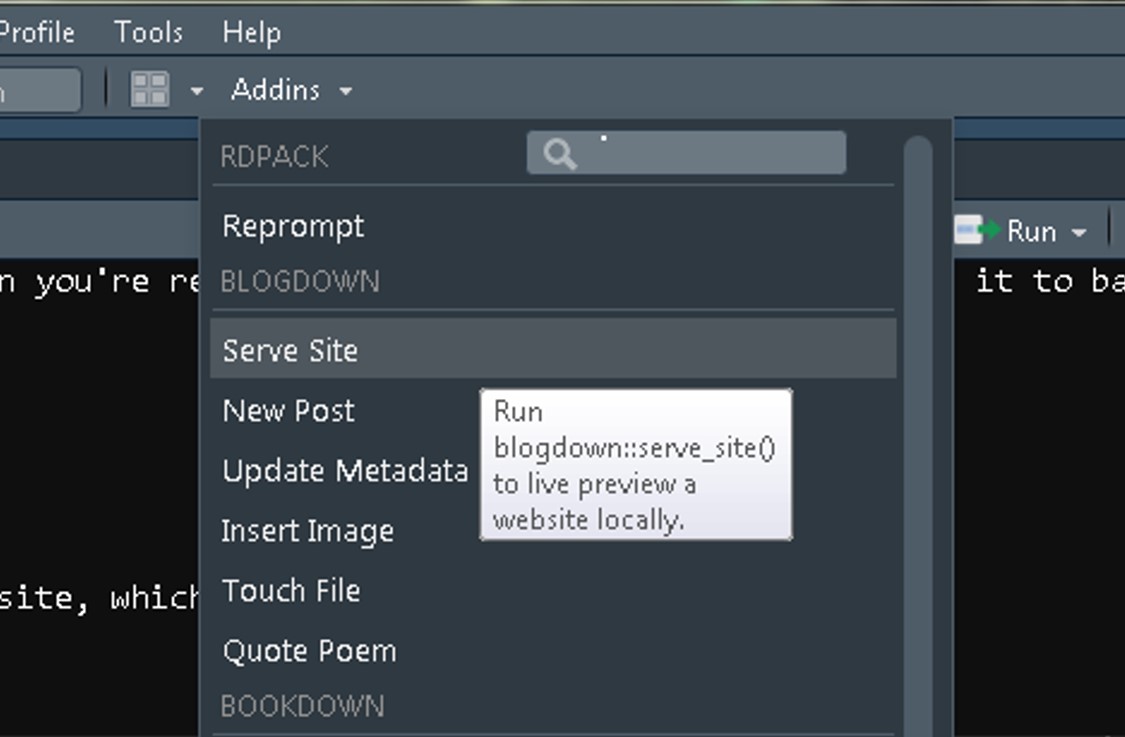
2 - serve_site()
Use serve_site() instead to create a local live preview of your website for testing.
This means that your PC is working as a server for your website, in much a similar way to when you’re building a Shiny app and visualise it on your machine before deploying it.
This also has a Serve Site Addin version
Project options
You are probably going to spend some time making changes to the config.tomlfile to personalise your website and run Serve Site several times to see the results.
One thing to be aware of is that whenever you run Serve Site your site remains active, and every change you make to the config.toml file (or any other file that feeds into your site) will trigger a re-render of your website, which can prove a bit annoying!
To prevent that, there is something you can change in the Project Options settings. Go to Tools → Project Options → Build Tools and un-tick the Re-knit current preview box.
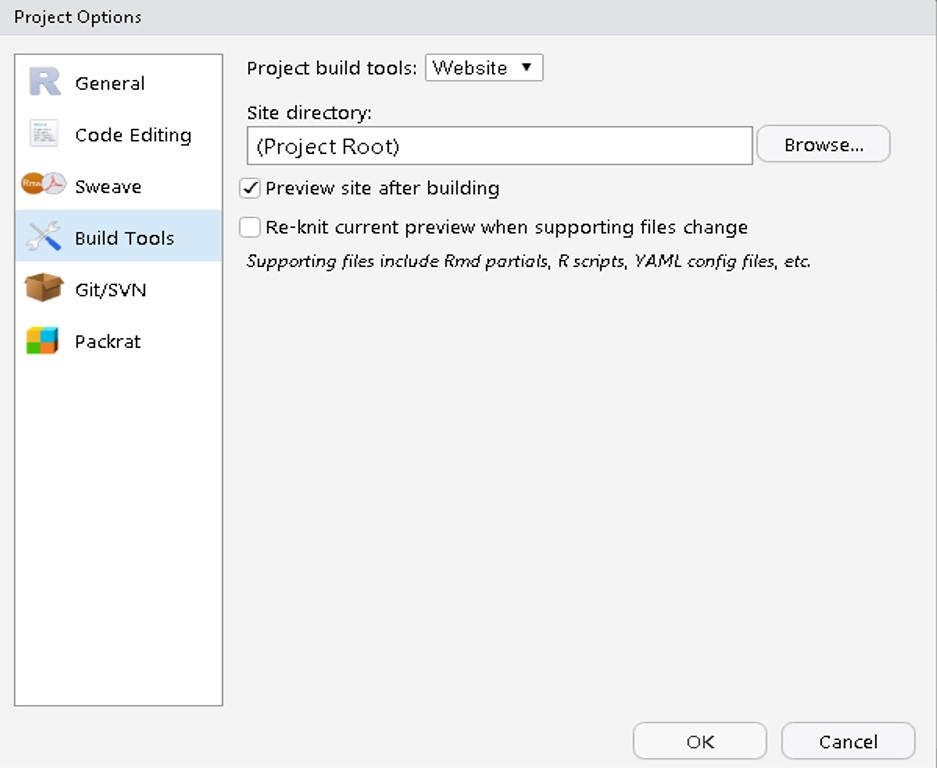
Now you can make and save several changes in a row but remember that to visualise them you’ll need to re-run Serve Site every single time.
Customise the theme
Typically, there are two way to customise your theme:
1 - Change config.toml parameters
Keep in mind that this is restricted to the options that the theme developer made available. For instance, to change the entries in your Main Menu, you can use the Categories that you assign to each article.
Say for argument’s sake that you have 4 articles you’ve assigned to the Data category. By changing the URL to /categories/data you generate a new entry in the main menu called Data which will show all 4 articles.
[[menu.main]]
name = “Data”
url = “/categories/data”
weight = 120
The weight parameter controls the relative position on the menu: the higher the weight, the further left the category will appear.
2 - Override individual HTML/CSS code
This is a bit more convoluted: if you want to override a certain aspect of the site’s look or functionality, you need to know which piece of code governs that particular aspect. In my case, that involved an awful lot of reading of online Hugo and HTML/CSS forums.
All key files are in Themes under the layouts and static folders:
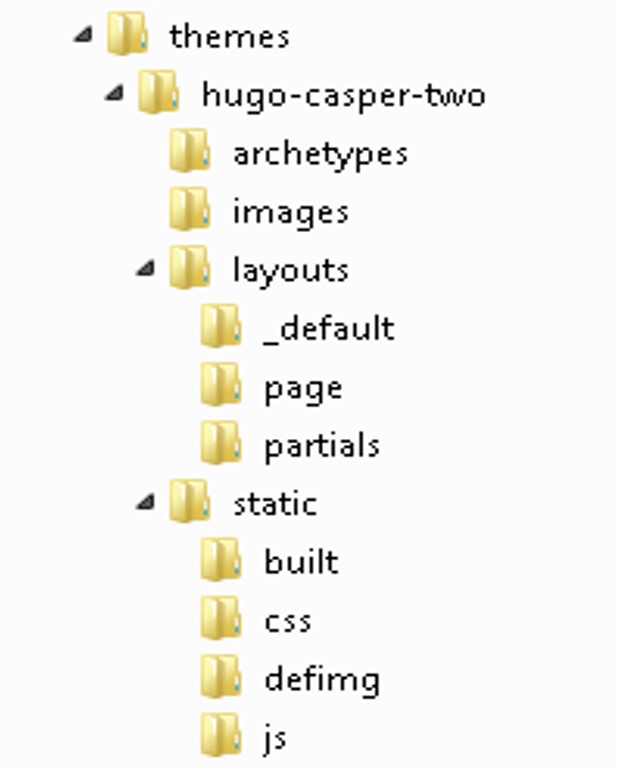
If you want to change something that is controlled by, say, the singles code in themes/layouts/page, you need to create a new folder called layouts/page under the project root and save an “override” version of the singles code in that folder.
The basic principle is that, when Hugo builds your site, it will look in the main folder first, find the override item and use that instead of the original one in the Themes folder.
Let’s go through one of the changes I’ve made and this will become much clearer.
Custom CSS
I’ve found a way to change the website main title font and weight. These aspects are controlled by the casper-two file stored in themes/static/css. Essentially, I created a new folder called css under the static main folder and put an “override” css file in it.
You can use the original css file in the Themes folder as template and edit it directly in RStudio. Use the CTRL+O short-cut and go to my_website_casper_two → themes → hugo-casper-two → static → css and load casper-two.
Then paste the code below in the body of the file and save it as overrides.css under static/css.
.site-title {
font-weight: 200;
font-size: 7rem;
}
.site-header:before {
background: rgba(0, 0, 0, 0.5);
}
DO NOT FORGET to edit customCSS = [“”] in your config.toml to customCSS = [“css/overrides.css”] or Hugo will still use the original css file in the Theme folder.
Add a post
Unless you’re transferring your blog from another platform, like Wordpress or Jekyll (in which case you can refer to this), you can simply add an existing .Rmd file to the content folder.
Before hitting Serve Site, there are some changes to make to the .Rmd header:
1- make sure you amend categories and tags
2- update the path to the image that sits right under the title (do not forget to add the image in the static/img folder)
3- you can also add a slug
title: "Using K-Means Clustering to Understand Marketing Response"
slug: a-gentle-introduction-to-customer-segmentation
author: "Diego Usai"
date: 2019-05-25
categories: ["ML Methods", "Articles"]
tags: ["Clustering", "Customer Segmentation"]
image: /img/nick-karvounis-SWIoVDRZWUY-unsplash.jpg
Now, the slug works in conjunction with the permalink parameter you find in the config.toml file. I’ve set up my permalink as follows…
[permalinks]
post = "/:year/:month/:slug/"
…which means that the above article will have this permalink:
http://diegousai.io/2019/05/a-gentle-introduction-to-customer-segmentation/
This is to guarantee that, should you want or need to transfer your blog to another platform, you won’t lose the back-links to your old blog and your article will not suddenly “drop off” natural search results.
To add a brand new post you can use New Post Addin. I’m yet to test this facility so I will not comment on it in this post, but you can read about it here
Fixing the Bugs
Main page not showing posts
When you Serve Site for the first time, you will notice that the home page is pointing to the posts folder and this requires an additional click to show your posts.
This is due to the fact that the Casper-Two Theme hasn’t been updated to work with Hugo 0.58 and later versions. Thankfully, I’ve come across this
posts that shows a quick solution.
Basically, as explained in the Custom CSS paragraph, I’ve created a new layout/partials folder under the project root with a copy of the post-list code in it.
I then swapped the first line of the post-list code…
{{ $paginator := .Paginate (where .Data.Pages.ByDate.Reverse "Type" "post") }}
… with this.
{{ $paginator := .Paginate (where .Site.RegularPages.ByDate.Reverse "Type" "post") }}
And hey presto, the problem was sorted!
Multiple formatting issues
This was a more complex issue I only became aware of when I had already invested several days of work in the project. Basically, paragraphs do not render properly in mobile format, cutting off at the edges.
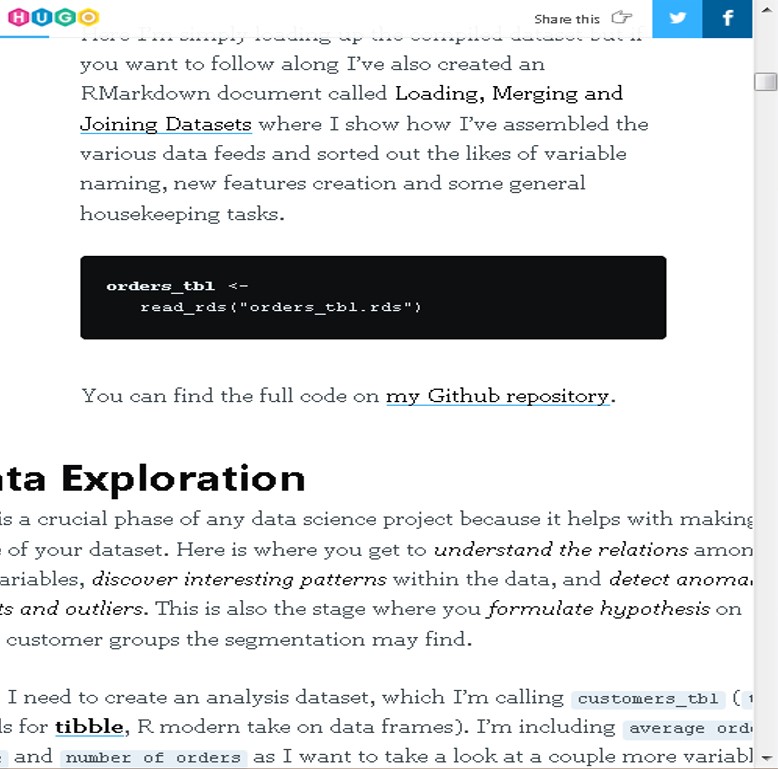
To make matter worst, external pictures would not show either, even when added through the Insert image Addin.
When I was seriously considering to re-start from scratch and switch to another theme, I decided to give myself another half day to search for solutions and thankfully bumped into this comment suggesting that if using RStudio, “RMarkdown [files] should be saved with the .Rmarkdown extension rather than the .Rmd extension”.
Luckily, this sorted both issues, killing the proverbial 2 birds with one stone!
Publish your site
Now you can deploy your website for the whole world to see. Due to the static nature of the site you’ve generated, this can be done in a large variety of ways. Here I’m going to show you how I got myself a custom domain, how I’m using my github account to host my site, and how I’ve linked all to Netlify for publishing.
Admittedly, it took a little while to get all the plumbing and wiring properly aligned and sorted out but I’m really happy with the final result, which I’m sure can still be improved on so suggestions are more than welcome. And I’m especially happy with how much I’ve learned in the process!
Housekeeping tasks
Make sure you change the
baseurlinconfig.tomlto your final one (“http://diegousai.io” in my case)Make your site and its entries searchable on SEO by enabling these:
enableRobotsTXT= truecanonifyURLs= true
You can add GoggleAnalytics and Disqus if you want:
googleAnalytics= “XX-123456789-1”disqusShortname= “your-disqus-id”
Github
First, I created a Github repository to house all my files. At this stage I could can either:
Link my R project to the GitHub repository (see here for how to do that) and “push” the
public/folder to GitHub from RStudio.Commit my R project via upload by manually drop the
public/folder to the github repository.
Given the tight time frame on this project I’ve opted for the manual upload. I will further explore the first option in the near future
Netlify
Netlify offers hosting and server-less backend services for static websites, and is widely recommended by the large majority of sources I’ve come across - you can check here, here, and here.
Once I created a basic account for free, I could publish a website in minutes by drag-n-drop the public/ folder through their web interface. But what I set out to do was to deploy my website directly from Github.
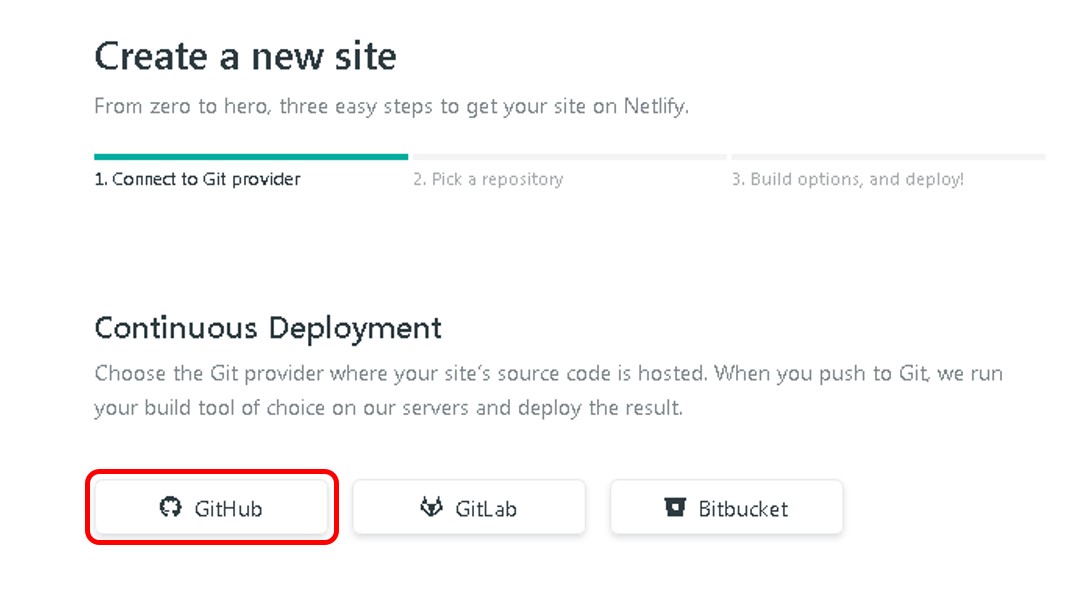
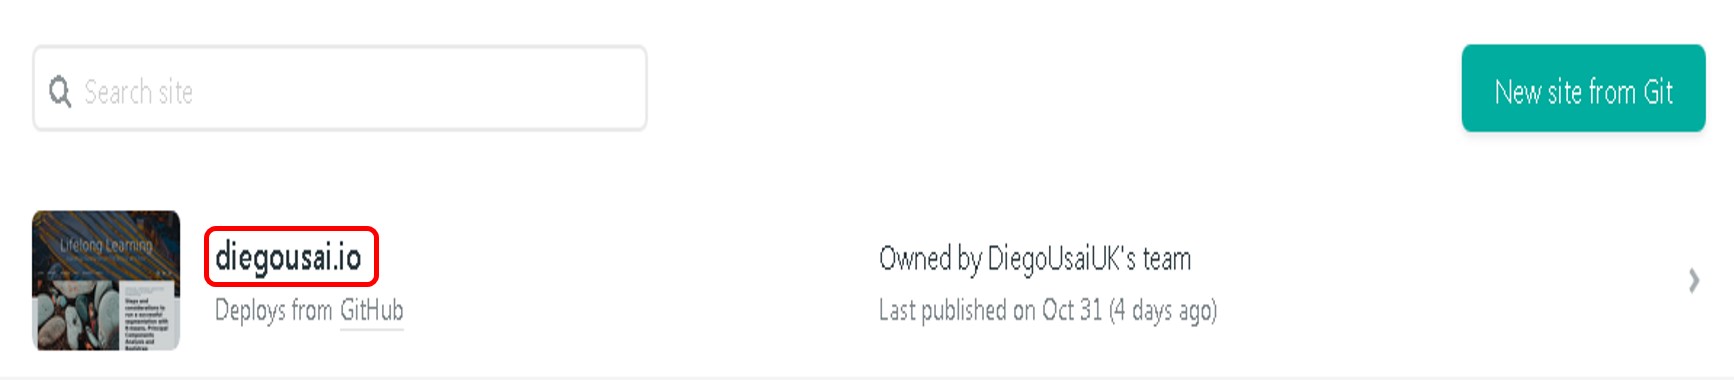
To do that, I first need to link Netlify to the relevant Github repository: from the Sites tab in Netlify, click on New site from Git and select GitHub to grant it access to your repositories.
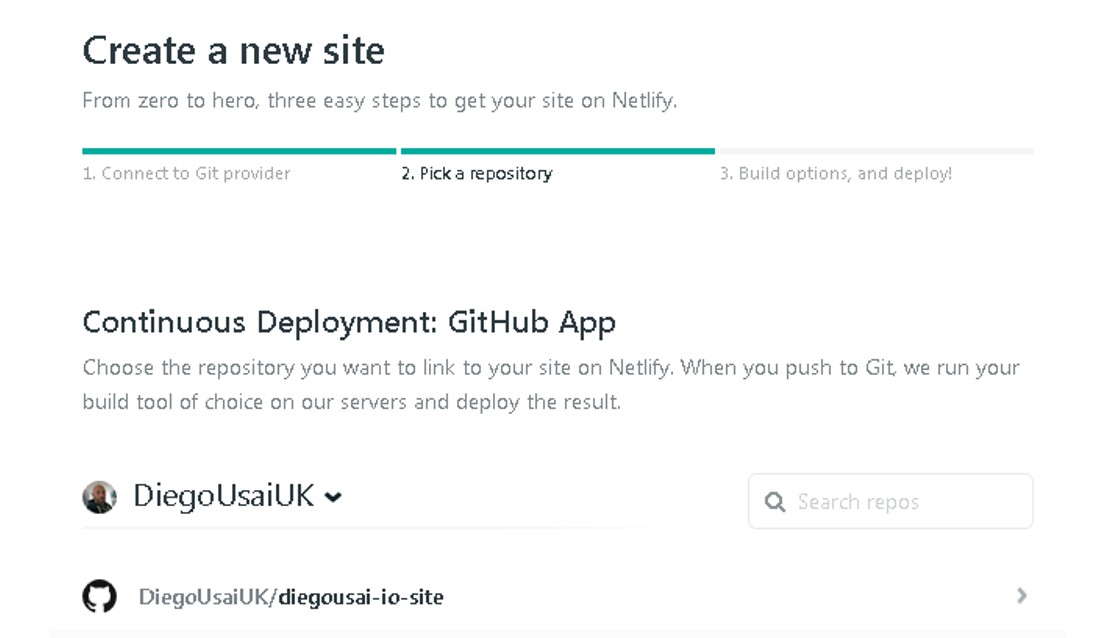
Once you’ve authorised Netlify, you can search and locate the website repository for your site (in my case diegousai-io-site)
The next step is to set the build options. Make sure to leave the build window blank (it plays up otherwise) and point the Publish Directory to public/.
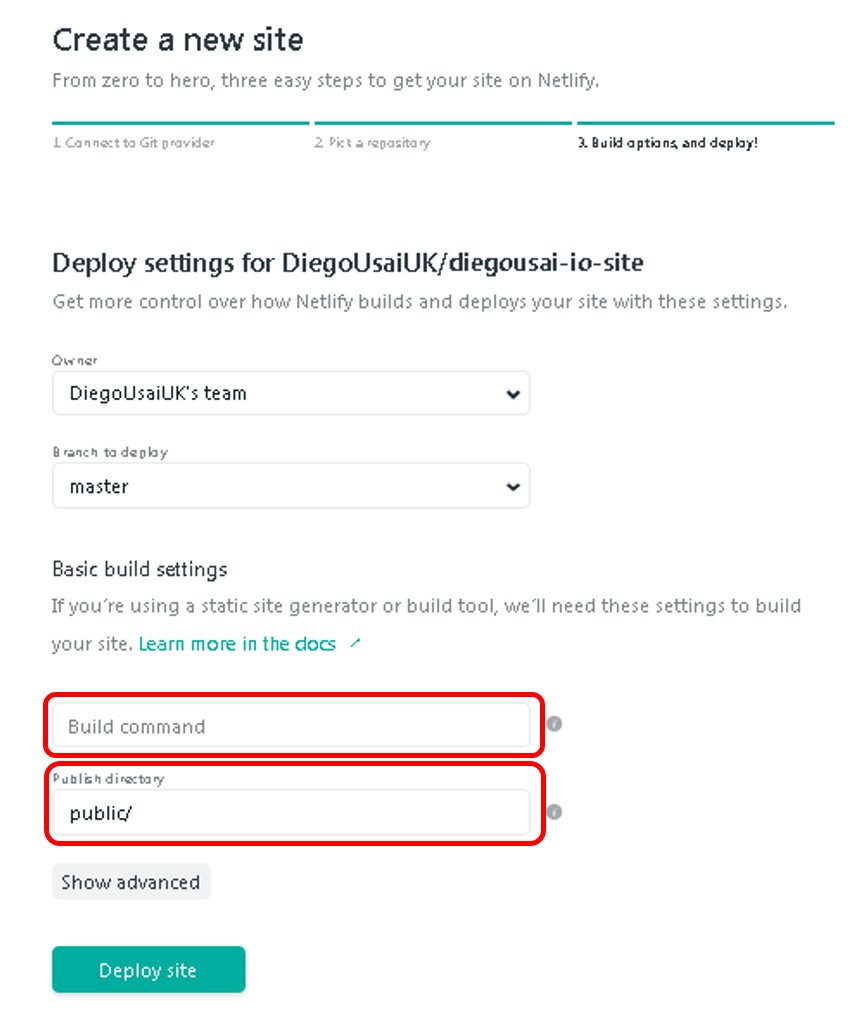
Click on Deploy site and Netlify bots will concoct all files into your website for you.
Custom Domain
With Netlify, your site gets assigned a rather impersonal subdomain along the lines of random.word-random.word-blahblahblah.netlify.com, which I really did want to personalise! So I got on Namecheap and bought myself a handful of custom domain names for a bargain price, including the one I’m using for my website: diegousai.io.
Last thing you need to do is to tell Netlify to use your personal domain instead of its random-generated one. On your Netlify homepage Navigation bar, click on Domains and select Add or register domain.

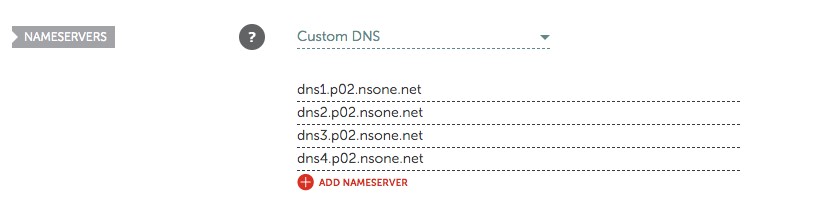
Follow the instructions and you will be provided with some nameservers codes (usually 4 of them), which are used to link you website and you domain. Now, go back to Namecheap, enter Domain List and select the relevant one with manage and on the domain tab scroll to nameservers, type the 4 codes you got from Netlify and save.
To verify that this worked, check if the Netlify site changed its random domain name to your custom domain.
Enable SEO
Although this theme supports SEO elements, enabling enableRobotsTXT and canonifyURLs in your config.toml is not enough to have your site and its content appear on SEO results. In my many readings, I’ve found some instructions on how to do just that on the Future Imperfect Original Theme github README.md.
Bear with me here because I’m very much outside my comfort zone so tips and suggestions are more then welcome!
First, you need to create an account on Google Search Console and Add your website as your own property. Once you’ve done so, google will ask you to verify domain ownership via DNS record and will give you these instructions:
Sign in to domain name provider
- Netlify in my case as I’ve delegated domain name handling from Namecheap
Copy TXT record into DNS configuration for diegousai.io
Next, go to your Netlify homepage Navigation bar, click on Domains and under DNS records select Add new record and paste the TXT record you got from google.
Then, you should Submit the sitemap (/sitemap.xml) for indexing but for some obscure reason, this only worked once for me: after many attempts Google Console loaded the sitemap only to tell me it was incomplete. I’ve then deleted it and have been unable to load the new one.
However, I’ve managed to submit both diegousai.io and www.diegousai.io for inspection with the URL inspection option and my site and some of its pages started to appear on SEO results.
This is still a work in progress so do take my instructions with a huge pinch of salt!
Some tips
I would like to close this post with a couple of tips that I hope others embarking on the journey would find useful.
TIP #1: one thing that worked really well for me was to add one of my articles to the content folder and create a few “prototypes” using different themes. This gave me not only the chance to see how my article would look like in the “finished product” but also allowed me to check if charts, code chunks and imported pictures were all rendered all right.
This is how I found out about the Future Imperfect Slim bug I mentioned earlier, and that .Rmd files struggle to show imported pictures.
TIP #2: do not forget to check if everything works fine in MOBILE VIEW!!!. Although the RStudio Viewer pane provides a mobile-like rendering, it is worth visualising your website in a browser and “shrink” the page to mimic a mobile view.
This revealed the issue that in mobile format, paragraphs cut off at the edges in Casper Two, which I’ve luckily managed to find a fix.
Closing thoughts
As a statistical analyst, learning the basics of website construction could be a daunting prospect. Sure, I could’ve opted for managed online site builders such as SquareSpace or WordPress but I would not have learned half as much as I did! And it wouldn’t have been half as rewarding!
Although I did find myself wondering a couple of times what devil possessed me to get into this (especially when it comes to SEO), all in all I’m rather happy with what I’ve achieved!
I learned lots of new concepts and ideas and I now have a really functional and nice looking webspace that should serve me well for some time to come.
Code repository
The full R code can be found on my GitHub profile
References
- The blogdown: Creating Websites with R Markdown book, which has plenty of accessible information and useful tips.
- The Academic framework documentation also has lots of information, albeit more technical.
- Alison Hill blogpost Up & Running with blogdown has provided plenty of inspiration
- Another post I would recommend is Martin Frigaard’s article, How to build a website with Blogdown in R, which has much more detail on Git and version control.
- Creating websites in R by Emily C. Zabor is a detailed introduction to creating websites using R, R Markdown and GitHub pages.
- Bingkai Wang’sHow to build a personal webpage in R for the nameservers suggestion